A while back I posted a knitting wish list with some of the designs I really liked and wanted to make. The items in my Ravelry queue tend to jump up and down the list as I find new, exciting things I want to make, or if I review the list and rearrange it. But I actually managed to finish two of the jumpers on the wish list this summer.
This is the Lavenda Rainbow Jumper, with long sleeves, because I live in Norway ;) Please excuse the mess in the back, it seems I'm unable to keep my sewing space tidy.
I nearly always reinforce the shoulders and neck of my jumpers with cotton tape, to make sure they keep their shape, and with this jumper I really had to, as the ribbed yoke is very stretchy.
This is the inside of one of the sleeves. I decided not to cut the yarn every time I changed colours, but do it the Norwegian way instead, which is to say I carried the yarn from each colour up the jumper, and wrapped the working yarn around the strands being carried every 4 row or so, making sure the tension of the yarn being carried was OK. My mum and nan used to do it this way and they showed me how it was done when I was little, so I figured I'd give it a go. It turned out very well.
I decided to use as much of my stash as possible and ended up using two different types of yarn; Drops Fabel and Ida Strømpegarn. Ida strømpegarn is a little heavier than Fabel, but the two yarns still worked well together. I made the torso longer than instructed as I wanted the striped part to start at my natural waist. I ended up using 1600 meters of yarn for the jumper which is quite a lot.
Now for something more serious. As many of you out there might already have heard the very kind and sweet Jessica from Chronically Vintage has had her house burned down. It happened Friday of last week, and she and her husband has lost practically everything they own.
There's a Facebook page for people wanting to help out in various ways, and if you live far away and it's impractical to send something you can make a cash donation here. I made a donation as it seemed the most practical solution.
Monday, October 17, 2016
Tuesday, September 27, 2016
New Job!
This week has so far been wonderful :)
I've had it confirmed that as of Monday week I'll be starting in a new job, and not just any job. I've been out of work for 3 months and was getting frustrated and a little desperate to find something. I was reaching the stage where I'd be happy to take just about anything when I got an interview with a very well renowned company, in a good position. I had 2 interviews and 1 test in the span of 2 weeks, and made it through. I'll be doing social media and website management for them, as well as a spot of advertising.
I celebrated with knitting myself a new tea cosy for my 2 cup teapot, which will reside in my office from next week onward :D
I've had it confirmed that as of Monday week I'll be starting in a new job, and not just any job. I've been out of work for 3 months and was getting frustrated and a little desperate to find something. I was reaching the stage where I'd be happy to take just about anything when I got an interview with a very well renowned company, in a good position. I had 2 interviews and 1 test in the span of 2 weeks, and made it through. I'll be doing social media and website management for them, as well as a spot of advertising.
I celebrated with knitting myself a new tea cosy for my 2 cup teapot, which will reside in my office from next week onward :D
I used a free pattern from knitting-and.com, and if anyone wants to give it a go you can find it here.
Saturday, April 02, 2016
Crochet Skirt Guards
I love bike riding :) It gives this wonderful sense of freedom, and it's so nice to take bike rides in the area I live. I live by Mjøsa, a large lake in Norway, and the entire area for miles and miles is wonderfully picturesque. I have a granny bike and I like to ride in style, which in my book is wearing nice tweed plus sixes or skirts, with matching jacket, coat or a jumper depending on the season, and knitted accessories. I would not be caught dead in the condom suits with padded bums so popular with many of my fellow cyclists.
Because of my preference for skirts I need skirt guards on my bike, and I prefer making them myself. I can get plastic ones that clip onto the bike, but why use them when I can have crochet or fabric skirt guards. There are a few crochet skirt guard patterns out there, unfortunately most of them are in Dutch, and the ones that are available in English all have rosettes in them, which can be nice but this time around I decided I didn't want rosettes. I spent a good few hours at the computer searching for the perfect skirt guard pattern, and when I found what I suspected might work it was of course in Dutch.
After sulking about it for a while I decided to try to translate it. As I don't speak Dutch this took some time and I made quite a few changes to the original pattern to make it fit the bike.
Behold the skirt guards :) The cotton yarn I used was 170 meters to 50 grammes. If I were to make them again I'd go for a fine crochet thread and instead add more rows of clusters, but all in all I think I did rather well :)
Here's the pattern, it's based on the free Landleven skirt guard pattern.
Because of my preference for skirts I need skirt guards on my bike, and I prefer making them myself. I can get plastic ones that clip onto the bike, but why use them when I can have crochet or fabric skirt guards. There are a few crochet skirt guard patterns out there, unfortunately most of them are in Dutch, and the ones that are available in English all have rosettes in them, which can be nice but this time around I decided I didn't want rosettes. I spent a good few hours at the computer searching for the perfect skirt guard pattern, and when I found what I suspected might work it was of course in Dutch.
After sulking about it for a while I decided to try to translate it. As I don't speak Dutch this took some time and I made quite a few changes to the original pattern to make it fit the bike.
Behold the skirt guards :) The cotton yarn I used was 170 meters to 50 grammes. If I were to make them again I'd go for a fine crochet thread and instead add more rows of clusters, but all in all I think I did rather well :)
Here's the pattern, it's based on the free Landleven skirt guard pattern.
Apart from the foundation
fan, the bottom treble groups and the solid part in the middle all
rows start with a new colour, from the right to the left.
UK terms
2.5mm hook
Tension: 20 trebles to 10 cm
Made with Garnstudio Loves You 7 (170 meters to 50 grammes)
Tension: 20 trebles to 10 cm
Made with Garnstudio Loves You 7 (170 meters to 50 grammes)
Foundation fan:
Chain 10 stitches, close
ring with a slip stitch
Chain 4, do 8 double
treble
*Chain 5, do a dc in next
stitch* continue to the end of the row. You should have 8 loops.
Chain 15, do a dc in first
loop, *chain10, dc in next loop*, continue to the end of the row
Chain 20, dc in first
loop, *chain 15, dc in next loop*, continue to the end of the row.
Chain16, dc in next loop, *chain 9, dc in next loop*, Continue to the
end of the row.
If you don't want the
foundation fan follow the below instructions:
Chain 81 sts
Start
groups of treble spaced by chains
1st
row: 1 treble in 4th chain, 1 treble in each of the 2 following
ch. *chain 2, skip 2 sts, 1 treble in each of the next 3 ch. Repeat
from * until there are 2 sts left. Finish with 1 treble in last
ch(gives a total of 16 clusters of 3 trebles+1 single treble).
2nd
row: chain 3 (makes the 1st treble) , 2 tr in the first space
between the clusters of the previous row. * ch 2, skip cluster, 3 tr
in the next space. Repeat from * until the last space is filled. 1 tr
in the 3rd sts from previous row (the first 3 chains that made the
first tr)
3rd
row: ch 5 ( the first 3 ch makes the 1st tr), 3 tr in the first
space. Ch 2, skip cluster, 3 tr in the next space. Repeat from *
until there are 2 sts left. 1 tr in the 3rd st from previous row (the
first 3 chains that made the first tr)
4th
row: Same as 3rd row, but end with ch 2, 3 tr in final space (17
clusters of 3 trebles).
Start
clusters:
5th
row: Ch 3, then 1 tr in same treble, * ch 2, 2 tr, 1 ch and 2 tr
in the next space. Repeat from *. (18 clusters)
6th
row: Attach thread in 1st
space, chain 4, 2 trebles in same space, chain 2, *2 tr, ch 1,
2 tr in the middle of the cluster from last row, ch 2. Repeat from *.
7th
row: Attach thread in 1st
space, chain 4, 2 trebles in same space, * Ch 2, crochet the two gaps
between clusters from the previous 2 rows together by passing the
hook under the second chain from the top, catch the thread and do a
dc. Ch 2, 2 tr, ch 1, 2 tr in the cluster from the previous row.
Repeat from *. Finish the row with 1 dc in the 2nd chain from last
row, then ch 2, 2 tr, ch 1, 1 tr in the last cluster.
8th
row: as row 5
9th
row: as 6th row
10th
row: as 7th row
11th
row: as row 5
12th
row: as 6th row.
13th
row: as 7th row
End
of clusters, start treble groups again
14th
row: ch 3 * 1 tr in the following tr, ,1 tr in the following tr,1
tr in the following space, ch 2, 1 tr in the same space, 1 treble in
each of the following trebles
15th
row: 1 treble in 4th chain, 1
treble in each of the 2 following ch. *chain 2, skip 2 sts, 1 treble
in each of the next 3 ch. Repeat from * until there are 2 sts left.
Finish with 1 treble in last ch
16th row: ch 3 * 1 tr in the following tr, ,1 tr in the following tr,1 tr in the following space, ch 2, 1 tr in the same space, 1 treble in each of the following trebles
Start
solid part
17h
row: ch 3, 1 tr in each following tr and 1 treble in each space
except for 6 spaces evenly distributed. In these 6 spaces make 2
trebles. Every 5 and 6 worked for me.
18th
row: ch 2, dc in each following tr.
19th
row: ch 3, inc 1 treble, * 1 tr in each of the following dc.
Repeat from *. Inc one treble at end. If you choose to make an
opening for the lock in this row stop after 33 trebles (including the
chain at the beginning of the row), chain 2 and follow instructions
in row 20, then follow instructions in row 21 until you finished the
33rd treble. Do not break thread.
The
opening for the lock will be 6 sts wide. Count 6 sts from the part
you just finished and continue from stitch 7. Follow instructions
from row 19 and 20. When you finish row 20 and reach the edge of the
lock opening break the thread. Use the thread from the first part,
chain 6 and continue after the lock opening. This will fit the right
hand side of the wheel. For the left remember to make the opening at
the other end of the skirt guard.
20th
row: as 18th row
21st
row: ch 3, 1 tr in each following dc.
Start
groups of trebles again
22nd
row: ch3, 1 tr in each of the following 2 tr. * ch 3, skip 1 tr,
1 tr in each of the following 3 tr. Repeat from *.
23rd
row: ch 6, 3 tr in he first space * ch 3, 3 tr in the following
space. Repeat from *. End with 1 tr in the last treble from previous
row.
24th
row: as 22nd row.
Clusters
again
25th
row: like 5th row, but chain 4 between clusters and 2
in cluster
26th
row: like 6th row, but chain 4 between clusters and 2
in cluster
27th row: like 7th row, but chain 4 before
crocheting the 2 chains from the 2 previous rows together, and
another 4 after. 2 chains in cluster.
- Repeat the last 3 rounds if necessesary to add height to the dress guards.
- Optional – crochet a row of dc along the sides
If you want to crochet loops for fastening at the top follow the below instructions:
Fasten
the yarn in the top right ch, do 1 tr in this ch. * ch 8, skip 2
clusters of 3 trebles, 1 dc in the following ch. Repeat from *. Do 1
dc in the last tr.
Friday, March 25, 2016
Spring Knitting Projects
You guys might have caught on to the fact that I've had problems with my arms. It lasted for years and limited the things I could do, but one of the things I could do was lust after knitted jumpers. My Ravelry queue inflated until it reached the stage where knitting everything on it was more wishful thinking than realistic goals.
Last summer I spent 2 months gradually getting used to knitting again, and since then I've mainly knitted DK winter jumpers, and I now own enough winter jumpers to last me a while. The next goal is lace and thin knitted jumpers for spring, summer and autumn :)
Again, my Ravelry queue keeps growing and mutating, and I thought it might make it easier to get an overview if I list the top 5 items on my knitting wish-list.
How about you guys, do you have any knitting/crafting plans made up?
Last summer I spent 2 months gradually getting used to knitting again, and since then I've mainly knitted DK winter jumpers, and I now own enough winter jumpers to last me a while. The next goal is lace and thin knitted jumpers for spring, summer and autumn :)
Again, my Ravelry queue keeps growing and mutating, and I thought it might make it easier to get an overview if I list the top 5 items on my knitting wish-list.
How about you guys, do you have any knitting/crafting plans made up?
Thursday, February 25, 2016
Loss, knitting and whatsit
Since my last post my mum passed away. It sort of knocked me off my feet, and blogging about it or anything at all didn't feel like an option. This was in September, and since then I've gone through all the rather unreal and disturbing things one has to do after a parent dies. Holding the funeral, going through her things, clearing out her house and putting it up for sale. All very emotional and hard, and introducing me to aspects of myself I don't much like. Like impatience with family members, developing a temper and snapping at people. I've not seen that side of myself since I was a teenager, and thought it was gone. Not so. Rather embarrassing, really. It didn't last, but it's still nagging away at me.
My mum collected vintage ornamental plates, coffee grinders and cream and sugar dishes. She must have had between 50 and 100 of the cream and sugar sets, all neatly displayed in glass cabinets. She also collected table cloths and, well, all sorts of things, really. I kept a few things, let the family take whatever they wanted and gave the rest away to charity.The feeling I'm left with is I suppose not a new one, but it felt wrong to go through her possessions, divide them into things to keep and give away, and dismember her life in such a way. It also made me think about my own collections. My books, fabrics and yarn, my collection of vintage clothes and jewellery. Much of it I don't even wear, which is really such a waste. I've decided to do my best to give these things an airing, and keep track of the things I never wear. If I still haven't worn them in a year (this goes for everyday fashions and jewellery, obviously party dresses are exempt) they'll go to charity.
I've also started knitting up the things I've wanted for years. Why wait? It's not as if we're guaranteed to live to a ripe old age any of us.
With this in mind here's a jumper I finished around Christmas. I used a free pattern from Trove, and it turned out very well :)
My mum collected vintage ornamental plates, coffee grinders and cream and sugar dishes. She must have had between 50 and 100 of the cream and sugar sets, all neatly displayed in glass cabinets. She also collected table cloths and, well, all sorts of things, really. I kept a few things, let the family take whatever they wanted and gave the rest away to charity.The feeling I'm left with is I suppose not a new one, but it felt wrong to go through her possessions, divide them into things to keep and give away, and dismember her life in such a way. It also made me think about my own collections. My books, fabrics and yarn, my collection of vintage clothes and jewellery. Much of it I don't even wear, which is really such a waste. I've decided to do my best to give these things an airing, and keep track of the things I never wear. If I still haven't worn them in a year (this goes for everyday fashions and jewellery, obviously party dresses are exempt) they'll go to charity.
I've also started knitting up the things I've wanted for years. Why wait? It's not as if we're guaranteed to live to a ripe old age any of us.
With this in mind here's a jumper I finished around Christmas. I used a free pattern from Trove, and it turned out very well :)
Sunday, August 09, 2015
Care of Bamboo Needles
I've bought quite a few inexpensive bamboo needles on ebay the last few years. Quite the bargain, and seeing as I'm a hoarder I like to have at least 3 sets of circular needles in each size, and double pointed needles as well.
The only problem with these needles is that they're rather rough and don't seem to have been properly finished. The can still be used as they are, but they will snag the yarn a little, and it will be hard to move the stitches up the needle. After having scoured the web for solutions to this I've come up with a solution that works for me.
To make your needles nice and smooth you'll need the following:
A nail buffer
Fine grain steel wool
Some lint free soft cloths you're prepared to throw out afterwards
Kitchen paper
Furniture oil, I use MP 52 møbelolje, which is meant to be used on untreated wood. It hardens the surface as it dries, and makes the needles very smooth.
If your skin is easily irritated I'd also recommend wearing latex gloves.
The first thing I do is to smooth the points of the needles with a nail buffer. I use the side that's meant for smoothing ridges from fingernails. Watching a film while doing this helps, as it's rather a monotonous chore. Once the tips are nice and smooth I use a fine grade steel wool to smooth the shaft.
Wipe off the dust with a soft cloth, and use a fresh cloth to oil the needles. Follow the instructions on your furniture oil bottle. If you are using the same kind of oil that I use the cloth you use to oil the needles will have to be thrown out. The oil gets stiff as it dries, and won't come off in wash.
When I've oiled my needles I polish them with another cloth, and leave them to dry overnight on a paper towel, the next day I polish them and then oil them for a second time. Once the oil has dried, and I've polished the needles they're silky smooth. Not quite as smooth as new wooden needles of good quality, but near enough :)
The only problem with these needles is that they're rather rough and don't seem to have been properly finished. The can still be used as they are, but they will snag the yarn a little, and it will be hard to move the stitches up the needle. After having scoured the web for solutions to this I've come up with a solution that works for me.
To make your needles nice and smooth you'll need the following:
A nail buffer
Fine grain steel wool
Some lint free soft cloths you're prepared to throw out afterwards
Kitchen paper
Furniture oil, I use MP 52 møbelolje, which is meant to be used on untreated wood. It hardens the surface as it dries, and makes the needles very smooth.
If your skin is easily irritated I'd also recommend wearing latex gloves.
The first thing I do is to smooth the points of the needles with a nail buffer. I use the side that's meant for smoothing ridges from fingernails. Watching a film while doing this helps, as it's rather a monotonous chore. Once the tips are nice and smooth I use a fine grade steel wool to smooth the shaft.
Wipe off the dust with a soft cloth, and use a fresh cloth to oil the needles. Follow the instructions on your furniture oil bottle. If you are using the same kind of oil that I use the cloth you use to oil the needles will have to be thrown out. The oil gets stiff as it dries, and won't come off in wash.
When I've oiled my needles I polish them with another cloth, and leave them to dry overnight on a paper towel, the next day I polish them and then oil them for a second time. Once the oil has dried, and I've polished the needles they're silky smooth. Not quite as smooth as new wooden needles of good quality, but near enough :)
Monday, August 03, 2015
Blog take two
I know that many bloggers go through phases where they're not that active, blogwise. It's been two years since I last posted anything, this is because I've gone through a long period of health problems. It turns out I have suffered from something called Muscular Pain Syndrome which brought on tendinitis and pains, especially in my arms and neck, and for years I had to ration out my strength and capacity. The well known spoon analogy ME sufferers use to explain their lives certainly applies here. I've managed to recover if not completely at least close to that, and this experience has changed my outlook on things.
I feel extremely lucky to have managed to get as well as I am. It was hard work, lots of trial and error, and frustrations galore, and now that my body works again it feels as if I've been given a second chance. I want to find a job I enjoy, be active, knit all the things that I've wanted for years, sew the 1930's men's trousers I've coveted and make replicas of some of my vintage clothes. I want to see if I'll be able to keep my sewing area tidy (how do other people manage it?) and sew up some of the fabrics I've been hoarding (to make room for more :D ). And I want to read and have Miss Marple and Poirot film marathons, not because that's all I can manage, but because it makes me feel great :)
In the midst of all this I'll give blogging a second go too. I'll aim to post at least once a week, expect to find blogs on the things I've made since I last posted, and possibly some book reviews.
Finally, here's a picture of yours truly enjoying a nice cup of tea, wearing my red miss Lemon jumper :)
I feel extremely lucky to have managed to get as well as I am. It was hard work, lots of trial and error, and frustrations galore, and now that my body works again it feels as if I've been given a second chance. I want to find a job I enjoy, be active, knit all the things that I've wanted for years, sew the 1930's men's trousers I've coveted and make replicas of some of my vintage clothes. I want to see if I'll be able to keep my sewing area tidy (how do other people manage it?) and sew up some of the fabrics I've been hoarding (to make room for more :D ). And I want to read and have Miss Marple and Poirot film marathons, not because that's all I can manage, but because it makes me feel great :)
In the midst of all this I'll give blogging a second go too. I'll aim to post at least once a week, expect to find blogs on the things I've made since I last posted, and possibly some book reviews.
Finally, here's a picture of yours truly enjoying a nice cup of tea, wearing my red miss Lemon jumper :)
Thursday, September 12, 2013
Pattern for the red Miss Lemon Jumper
I've decided to post the pattern I used for the red Miss Lemon jumper, as I've noticed that I'm far from the only fan out there who'd love to knit it.
The pattern is sized for a 38-ish bust, but the jumper is very elastic.
I reinforced the shoulder seams by sewing on cotton tape along the
seams, and I also reinforced the centre front behind the bows. If I were to knit this jumper again I’d make the welt longer, some 5
inches and I’d use another stitch. Probably something like k5, p1. I’d
also shorten the armscye.
The pattern is sized for a 38-ish bust, but the jumper is very elastic.
Materials: Drops Alpaca Silk baby yarn, 1
skein blue and white, 9 skeins red.; 1 pair each 2mm and 2.5mm
knitting needles; buttons.
Measurements: Width all round at underarm,
35in.; length from top of shoulder to hem, 22in.; length of sleeve
seam underarm, l7in.
Tension: To get this tension it is
absolutely necessary to work at a tension to produce 8.1 sts. to one
inch in width measured over pattern. 11 rows to 1 inch. The fabric is
very elastic.
Back:
Using 2mm needles cast on 122 sts. Knit in ribbing
of k1, p1 until work measures 3 inches, ending on the wrong side of
work (28 rows).
Change to 2.5mm needles
Row 1: k1, inc 1, k15*inc 1, k15* . Repeat pattern
until end of the row. You should now have 130 sts, which gives a
width of 16 inches underarm.
Continue in main stitch:
1st row.- K. 1, p. 1
2nd row.- knit
Repeat these two rows throughout.
Armhole:
When work measures 12 inches Cast off 6 sts. at
beg. of next 2 rows, knit 2 together each end of needle in the next
row. Then knit the last 2 stitches of every following row together
until 104 sts. rem (12 rows).
Neck Shaping:
When armhole measures 7 inches shape the rounded neck by casting off the middle 20 sts. Work on one side only now. Cast off 3 stitches at the neck edge in every other row twice. Knit 2 together at the same edge in every other row 3 times.
Then shape the shoulder by doing short rows. Knit from the neck edge towards the shoulder until there are 10 stitches left on the needle, turn and knit until end of row (this takes you back to the neck edge). Turn and knit until there are 20 sts left on needle, turn and knit until end of row. Turn and cast off all stitches.
Join the wool in on the other side of the neck and complete this shoulder in the same manner as the one just finished.
Neck Shaping:
When armhole measures 7 inches shape the rounded neck by casting off the middle 20 sts. Work on one side only now. Cast off 3 stitches at the neck edge in every other row twice. Knit 2 together at the same edge in every other row 3 times.
Then shape the shoulder by doing short rows. Knit from the neck edge towards the shoulder until there are 10 stitches left on the needle, turn and knit until end of row (this takes you back to the neck edge). Turn and knit until there are 20 sts left on needle, turn and knit until end of row. Turn and cast off all stitches.
Join the wool in on the other side of the neck and complete this shoulder in the same manner as the one just finished.
Front:
Cast on 145 sts (makes for 19 inch width after
increases), increase to 154 sts and knit until work measures 12
inches.
Front Armhole:
When work measures 12 inches Cast off 10 sts. at
beg. of next 2 rows, knit 2 together each end of needle in the next 5
rows. Then knit the last 2 stitches of every following row together
until 104 sts. rem (20 rows).
When armhole measures 6 3/4 inches shape round
neck by casting off the middle 20 sts. Work on one side only now.
Cast off 3 stitches at the neck edge in every other row twice. Knit 2
together at the same edge in every other row 3 times, turn an knit
next row. Knit 3 more rows. Shape the shoulder by knitting until
there are 11 stitches left on the armhole edge, turn and knit until
end of row. Knit until there are 22 sts left on the armhole edge,
turn and until end of row. Turn and cast off all stitches.
Join the wool in on the other side of the neck and
complete this shoulder in the same manner as the one just finished.
SLEEVES (Both Alike)
Using 2mm needles cast on 68 sts. Work in rib of k
1, p 1, for 3ins, working 1st row into back of sts.). Change to 2.5mm
needles and increase 1 stitch at each end of the needle in every
fifth row until there are 90 stitches (11 times).
After welt knit *6 rows (aim for a little less
than 1 inch), 2 blue, 6 rows red, 2 white, 6 rows red*. Repeat 2 more
times.
Knit until the sleeve measures 18 inches at the
underarm seam.
Shape the top of the sleeve by knitting 2 st
together at the beginning of every row until there are 30 stitches
left. Cast off.
Make another sleeve to match
Bows:
With 2.5mm needles cast on 40 stitches loosely for
both bows.
Large bow:
K 7 rows white, 2 rows red, 6 rows white, 2 rows
blue, 6 rows white, 2 rows red, 6 rows white, 2 rows blue, 24 rows
white, 2 rows blue, 6 rows white, 2 rows red, 6 rows white, 2 rows
blue, 6 rows white, 2 rows red, 7 rows white.
Small bow:
7 rows white, 2 rows
blue, 6 rows white, 2 rows red, 6 rows white, 2 rows blue, 24 rows
white, 2 rows blue, 6 rows white, 2 rows red, 6 rows white, 2 rows
blue, 7 rows white
Centre front band:
With 2.5mm needles cast on 18 stitches (should be
2 inches wide), knit in k1 p1 rib.
The finished band should reach the top of the
ribbing at the waist. To check the length of the band gather the bows
at front, and pin the band in place. Allow the jumper to hang a for a
while, as the band most likely will sag a little. Once you're sure
you've reached the right length graft the band to the top of the
ribbing. Stitch on buttons, and tack front band to jumper at regular
intervals.
TO MAKE UP
Press pieces with a moist cloth and iron set to
silk. Take care not to apply pressure on the pieces, just touch the
iron gently to the cloth for a second or two, lift and reposition the
iron, repeat. The idea is to get steam into the fabric. Leave pieces
to dry completely.
Sew up shoulder, side, and sleeve seams, sew in
sleeves, placing seam to seam. Make edging for neck. Stitch on centre
front band.
Block the bows by moistening them and pinning them
into shape, leave to dry.
Sunday, June 23, 2013
Miss Lemons Black and White Jumper
I finished this jumper this spring, but haven't gotten around to posting about it yet. I ended up using another template for the jumper than the one I first intended, as I found it hard to meet the gauge. I was afraid the jumper would end up too stiff if I used very fine needles, so I chose another pattern from one of my books, with the same basic shape, but a different gauge. In retrospect I realise that I could have tightened the gauge some, but I'm still pleased with the outcome.
On another note it's still raining cats and dogs here in Lillehammer. Before we moved here we were told that the summers would make up for the very cold and long winters. So far I'm not too impressed.
Saturday, June 22, 2013
Twin Set for Winter
Hiya all.
It's been quiet here for a while, sorry about that. I've been working in a lower secondary school since March, and although it has been enjoyable it left me with no energy for blogging. Now school is out for summer though, and this being Norway, I'm already thinking about the fall and warm clothes... Probably because for the 3rd summer in a row the weather has been rather s**t, with flooding and the railroad closed due to land slides brought on by the rain. Sigh... Perhaps Italy or France would have been a better choice when leaving Ireland?
For those of you out there who, like me, are contemplating knitting a twin set for fall and winter, here's a pattern in 3 different sizes with 3 different stitches to choose from, from James Norbury's book "Knit With Norbury". Happy knitting :)
It's been quiet here for a while, sorry about that. I've been working in a lower secondary school since March, and although it has been enjoyable it left me with no energy for blogging. Now school is out for summer though, and this being Norway, I'm already thinking about the fall and warm clothes... Probably because for the 3rd summer in a row the weather has been rather s**t, with flooding and the railroad closed due to land slides brought on by the rain. Sigh... Perhaps Italy or France would have been a better choice when leaving Ireland?
For those of you out there who, like me, are contemplating knitting a twin set for fall and winter, here's a pattern in 3 different sizes with 3 different stitches to choose from, from James Norbury's book "Knit With Norbury". Happy knitting :)
Sunday, March 17, 2013
Longline bra or corset?
I finished the 3rd mock up today, and as I did the fitting I noticed that the fabric wrinkles a bit in the back, and the sides as well so I think I'll have to add boning along some of the seams. I'll also make it longer in front so it extends further down, cupping the tummy, and increase the height in the back. This will end up a corset with cups I suspect. I suppose I could make it front closing as well, and use one of my old busks, but that would stiffen the front considerably.
I've never made a wearable mock up before, but perhaps the time has arrived for it to be a sensible thing to do. Thing is at the moment I don't have any powernet fabric. I've ordered it, but it will probably be a week before it arrives, so if I'm to make a wearable mock up I'll have to find another solution. Perhaps cut up a pair of control top tights, or use double layer merino wool jersey. Or I could stitch together wide elastic to form panels.
Labels:
1940's bra,
fitting,
fitting issues,
lingerie,
vintage bra,
vintage lingerie
Another Bra Adventure
Sorry for the recent silence. I had a breast reduction done end of January, and time seems to have flown by. I'm really happy with the results, it's just so nice to have small breasts and not have to carry around the weight of the old ones. It's also nice to have them back up where they belong :)
I had to wear a soft non wired bra 8 weeks after the surgery, and the sports bra was all right, but I wanted something that would give more shape, so I bought a few classic 1950's 60's style bras, the kind grannies usually favour, and it's amazingly comfy, at least when you have relatively small breasts. They mostly come in black and white, but I've found out that most of the white ones can be dyed, so I now have brown, wine and dark blue bras as well as black.
I've been thinking of diving back into hand made lingerie. I made a bra a year ago from this pattern, and I decided to give it another go, but do the longline version this time. So far I've been struggling with the mock up. I altered the pattern again tonight, and will give it another go tomorrow. The last time I made this bra I measured myself from between the breasts straight across the fullest part to the point where I wanted the cup to end, but since I now have a 38 inch bust (yay!) I thought it would be fine to simply cut out the pattern as marked, but no. I needed to make the cup wider this time as well. I'll start on the third (!) mock up tomorrow, wish me luck.
I had to wear a soft non wired bra 8 weeks after the surgery, and the sports bra was all right, but I wanted something that would give more shape, so I bought a few classic 1950's 60's style bras, the kind grannies usually favour, and it's amazingly comfy, at least when you have relatively small breasts. They mostly come in black and white, but I've found out that most of the white ones can be dyed, so I now have brown, wine and dark blue bras as well as black.
I've been thinking of diving back into hand made lingerie. I made a bra a year ago from this pattern, and I decided to give it another go, but do the longline version this time. So far I've been struggling with the mock up. I altered the pattern again tonight, and will give it another go tomorrow. The last time I made this bra I measured myself from between the breasts straight across the fullest part to the point where I wanted the cup to end, but since I now have a 38 inch bust (yay!) I thought it would be fine to simply cut out the pattern as marked, but no. I needed to make the cup wider this time as well. I'll start on the third (!) mock up tomorrow, wish me luck.
Labels:
1940's bra,
fitting,
fitting issues,
lingerie,
vintage bra,
vintage lingerie
Friday, January 04, 2013
Gauge and Ease Frustrations
The one thing that is starting to dawn on me is just how hard it is to estimate the amount of positive or negative ease needed in a knitted garment.
I had no idea it could be as hard as I've found it to be. My first attempt at knitting a jacket for myself ended up way too big, and I frogged it. I considered making a gift of it, but the proportions was just not flattering. Not at all what I was after.
The second attempt was the vest I made in December. This also ended up too big. This time I got the measurements right, but the fabric was too soft and elastic, which made it a couple of sizes too big anyway.
I'm halfway done with the camiknickers from the pattern I posted. I decided to knit it in the round, not realizing it would make it very hard to gauge whether it would fit, so for now it's hibernating while I'm summoning the courage to place the stitches on a string and try it on.
Finally I started on the red Miss Lemon Cardigan. This time I decided to knit it flat, and started on the back piece after swatching. I calculated gauge correctly, but when I tested the fit after 7 inches on my dressmakers dummy I discovered that it was still too loose, and had to unravel it down to the ribbing. This is starting to annoy me quite a bit. It seems I will have to knit the equivalent of a small baby blanket of the stitches I plan to use to see how the fabric behaves.
How do the rest of you knitters cope with this?
I had no idea it could be as hard as I've found it to be. My first attempt at knitting a jacket for myself ended up way too big, and I frogged it. I considered making a gift of it, but the proportions was just not flattering. Not at all what I was after.
The second attempt was the vest I made in December. This also ended up too big. This time I got the measurements right, but the fabric was too soft and elastic, which made it a couple of sizes too big anyway.
I'm halfway done with the camiknickers from the pattern I posted. I decided to knit it in the round, not realizing it would make it very hard to gauge whether it would fit, so for now it's hibernating while I'm summoning the courage to place the stitches on a string and try it on.
Finally I started on the red Miss Lemon Cardigan. This time I decided to knit it flat, and started on the back piece after swatching. I calculated gauge correctly, but when I tested the fit after 7 inches on my dressmakers dummy I discovered that it was still too loose, and had to unravel it down to the ribbing. This is starting to annoy me quite a bit. It seems I will have to knit the equivalent of a small baby blanket of the stitches I plan to use to see how the fabric behaves.
How do the rest of you knitters cope with this?
Tuesday, January 01, 2013
Miss Lemon
I own all the Hercule Poirot films, and watch them at regular intervals, sometimes just to drool over Miss Lemon's outfits. He has such lovely things it makes me both greedy and envious.
To alleviate this I've decided to give a go at recreating some of her things, most specifically two of her jumpers. The lovely red one that looks like a cardigan at first glance, and the black one with white polka dots. Swoon...
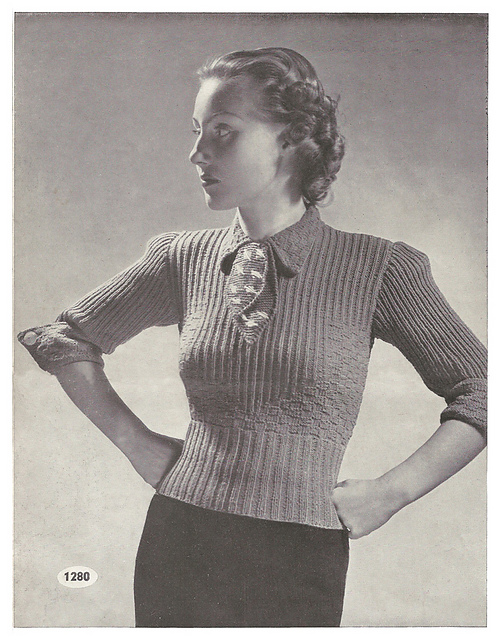
You can follow the red jumper project here. I'm making the pattern up as I go along, and I've settled for a broken rib pattern as the main stitch. If the jumper turns out the way I hope it will I'll post the pattern here once it's done.
The black jumper project is outlined here. Don't you just love Ravelry? Such a handy site. I haven't started on the black jumper yet, but I've found a pattern in one of my books that should give a good framework to it. The stitch will have to be altered, but the basic shape is more or less the same. For others out there with Miss Lemon envy I am posting the pattern I'll be using for the black jumper. Enjoy :)
To alleviate this I've decided to give a go at recreating some of her things, most specifically two of her jumpers. The lovely red one that looks like a cardigan at first glance, and the black one with white polka dots. Swoon...
You can follow the red jumper project here. I'm making the pattern up as I go along, and I've settled for a broken rib pattern as the main stitch. If the jumper turns out the way I hope it will I'll post the pattern here once it's done.
The black jumper project is outlined here. Don't you just love Ravelry? Such a handy site. I haven't started on the black jumper yet, but I've found a pattern in one of my books that should give a good framework to it. The stitch will have to be altered, but the basic shape is more or less the same. For others out there with Miss Lemon envy I am posting the pattern I'll be using for the black jumper. Enjoy :)
Wednesday, December 19, 2012
Lace Camiknickers
It was so nice to see the knitted vest take shape and create something from one of my knitting books I decided to go ahead and knit these lace camiknickers too. I am using the gauge given in the pattern, and added 2 pattern repeats total. I am knitting it in the round, as I'd rather not have any seams in the garment. The yarn I'm using is a lace weight alpaca/silk mix, and it makes a wonderfully soft fabric.
I am not really used to having to learn by doing. Normally I can read my way to most things, but with knitting it's really different. In the beginning it frustrated me, but now I'm starting to enjoy the process. So far I think the biggest surprise is the amount of negative ease I can calculate in. With the alpaca vest I thought it might end up a tight fit, but not at all. It's amazingly elastic. I'm looking forward too see what new things I'll learn on this project :)
Sorry about the quality of the pictures. I decided to use my camera, as the scanner is awkwardly placed and a pain to get to.
I am not really used to having to learn by doing. Normally I can read my way to most things, but with knitting it's really different. In the beginning it frustrated me, but now I'm starting to enjoy the process. So far I think the biggest surprise is the amount of negative ease I can calculate in. With the alpaca vest I thought it might end up a tight fit, but not at all. It's amazingly elastic. I'm looking forward too see what new things I'll learn on this project :)
Sorry about the quality of the pictures. I decided to use my camera, as the scanner is awkwardly placed and a pain to get to.
Tuesday, December 18, 2012
Knitted Undies Part 2
Behold!
I've finished the knitted vest :) Just in time for the below 20's, I suspect. At the moment it's not very cold at all, it varies between -2 to -7 degrees, but this can surely not last.
I had my breast reduction approved, and will have the surgery some time after new years, so I padded the dress form with what I think (hope) my new measurements will be.
For anyone interested in the notes I made while knitting this you can have a look at my project at ravelry.
I've finished the knitted vest :) Just in time for the below 20's, I suspect. At the moment it's not very cold at all, it varies between -2 to -7 degrees, but this can surely not last.
I had my breast reduction approved, and will have the surgery some time after new years, so I padded the dress form with what I think (hope) my new measurements will be.
For anyone interested in the notes I made while knitting this you can have a look at my project at ravelry.
Sunday, November 25, 2012
Knitted Undies
Oddly enough winter still hasn't fully arrived here in Lillehammer. I'd expect to be freezing my bum off by now, but currently the temperature seems to fluctuate between -4 to +6 Celsius. With luck I'll be able to knit up the woollen undies below before we hit the below 20's.
A little about vintage knitting patterns and sizing. The needle sizes in the pattern are old UK sizes. I am making my vest in a fine 3 ply alpaca yarn (Drops Alpaca), using 3.5 and 3 mm needles, to fit my current measurements of 43-33-41. The fabric really is very elastic, and I think you could use this yarn and needle sizes to comfortably fit 3 inches smaller or larger than mine. I am hoping to be approved for a breast reduction myself, so I figured if the top gets a little loose afterwards, I'll just undo the lacy bit and reknit it using a smaller needle. I'm knitting the vest in the round so I won't have to contend with seams if this should prove necessary. The original vest is also very long, 22 inches seams. Mine will be around 16 inches from underarm to bottom.
Enjoy :)
Click on the images to enlarge. This is intended for personal use only. Please do not copy and sell.
A little about vintage knitting patterns and sizing. The needle sizes in the pattern are old UK sizes. I am making my vest in a fine 3 ply alpaca yarn (Drops Alpaca), using 3.5 and 3 mm needles, to fit my current measurements of 43-33-41. The fabric really is very elastic, and I think you could use this yarn and needle sizes to comfortably fit 3 inches smaller or larger than mine. I am hoping to be approved for a breast reduction myself, so I figured if the top gets a little loose afterwards, I'll just undo the lacy bit and reknit it using a smaller needle. I'm knitting the vest in the round so I won't have to contend with seams if this should prove necessary. The original vest is also very long, 22 inches seams. Mine will be around 16 inches from underarm to bottom.
Enjoy :)
Click on the images to enlarge. This is intended for personal use only. Please do not copy and sell.
Monday, November 12, 2012
Knitted Bra Pattern
I have been drooling over this knitted bra I found on Ravelry for the longest time, unfortunately the pattern is in German, and although I did one year of German in school, my German is sadly lacking. But, I decided to give a go at translating the text, and you'll find it below. Please keep in mind that I cannot guarantee that I got it 100% right.
Brassier
The brassier is made
with white CMS Perlgarn Nr. 5. on US 0 - 2.0 mm needles. Garter
stitch pattern. Bust size 112 cm.
You start at the lower
end of the bra casting on 224 stitches. Continue in rib knit of k. 2
p. 2 for 16 rows, (or as long as you'd like) slipping the first stitch of every row. Cast off 22 stitches at
the beginning of the following row, knit 60, place on a string or a
stitch holder, knit another 60 and place these too on a stitch
holder. This leaves 82 stitches. Knit till the end of the row. The
next row: cast off 22 stitches at the beginning of the row and knit
the remaining 60. Then knit the last two stitches of each row
together until there are no stitches left.
The middle triangle is
worked the same way as the first until there are 10 stitches left on
the needle. Knit another five rows and then cast off stitches.
The last triangle is
made the same way as the first.
The cup part:
cast on 30 stitches, *
knit until end of row, knit two stitches together, turn and knit next
row*. Repeat these two rows until there are 5 stitches left on the
needle. Pick up 25 stitches along the cast off edge and
repeat the above instructions. Repeat until you have 7 triangles,
cast off the last 5 stitches and stitch the cup closed.
Repeat for the second
cup.
Stitch the cups onto the lower edge by fitting four triangles into the v
opening of the lower edge of the bra. Crochet a picot edge over the
upper edge.
Straps: Cast on 110
stitches, knit garter stitch for 10 rows, cast off.
Row 5: Cast off
stitches 5-7 and 11-13 for buttonholes.
Row 6: Knit until
buttonhole, make 3 stitches, continue, repeat.
Stitch the straps
towards the back of the side triangle with the buttonholes facing the
front. Stitch a button to the top of the breast cup.
Stitch press stud
buttons to the back of the bra to fasten it.
Update:
I had a German friend look over the original pattern, and it seems I got it right :)
Update:
I had a German friend look over the original pattern, and it seems I got it right :)
Subscribe to:
Posts (Atom)


.jpg)
.jpg)
.jpg)
.jpg)